Thursday, March 28, 2013

Rivoli Urchin Necklace Kits


Back by popular demand is the Rivoli Urchin Necklace kit in green and bronze. 
I don't often make a kit color scheme more than once after it sells out because it can be tricky trying to re-source the beads later.  But we had a lot of people asking for this one, so I did it.  It took me the good part of a year to track down all of the ingredients again, and here it is.  Thanks for looking.

Tuesday, March 26, 2013

Starburst Necklace (Water), Part 2

I'm still working on my Starburst Galaxy necklace kit in this color scheme inspired by water. 
I think I finished all of the stars I'm going to use in this piece. I wanted to make a nice sample of the different sizes, so the kits I'm going to assemble for my students will make all of the stars shown here. Still, I'm going to leave it up to the individual students to find their own drop beads. I'm also going to let them decide how they want to finish the back, or if they want to make a bracelet or earrings or what.

...which brings me to my next task, figuring out how to finish the back of this necklace... with a beaded cable, maybe? A metal chain, ribbon, or stringing beads? Oh the possibilities!

Thanks for looking.

Monday, March 25, 2013

Desiging Starburst Galaxy Kits Water


I'm working on classroom kits for the Starburst Galaxy class that Florence Turnour and I will be teaching at the Bead & Button Show in June 2013.    The class will teach you to make stars in four different sizes, each with any numbers of points.  The five stars here are just a few of the 20 or more possibilities.

These stars are links, meaning that they are components that you can connect together with jump rings.  You can also dangle wired drops from their points.  After I finish weaving the rest of the set, I'll link them together to make a large necklace and show you. 

We now have patterns and kits available for the Beaded Starburst Galaxy so you can learn to make them yourself.

Thursday, March 21, 2013

Bat Country: A Sierpinski Tetrahedron Jungle Gym

The mathematical sculpture that we made 6 years ago, Bat Country, has been selected as one of the 2013 Burning Man Honorarium Art Projects!  This will be the third time we will have brought the full sculpture to Burning Man.  We are honored in being selected given the number of art grant submissions this year.  Thanks to all who have participated in building Bat Country.
Bat Country is 21’ tall six-sided tetrahedron built from 384 aluminum baseball bats and 130 twelve-inch softballs.  The bats form the structure’s edges; there is one softball at each vertex.
Each edge of the structure measures 26’ in distance.
The structure is designed to be and intended to be climbed upon; ½” threaded steel rod runs through the axis of each bat.  These rods bolt to steel joining plates at each vertex.  This provides structural stability and facilitate transportation and on-site assembly.
The total structure weighs about 2500 lbs.  We placed a blue LED behind each of the 130 softballs. 
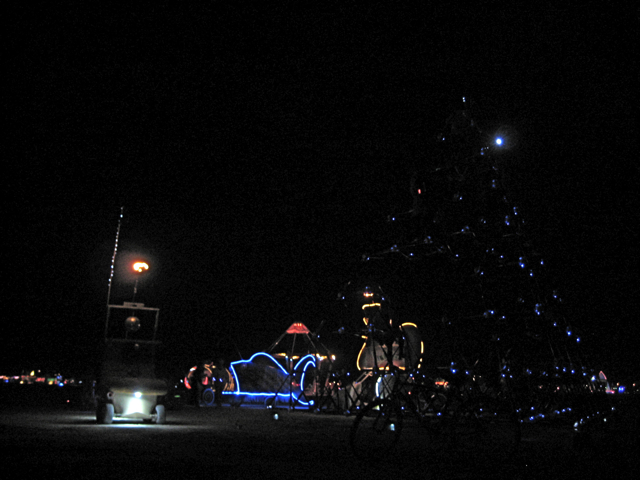
Here you can see Bat Country at an art car party at night.
A propane fireball really lights it up.
Mathematically, Bat Country is an example of a third-generation Sierpinski tetrahedron. Waclaw Sierpinski was a 20th century Polish mathematician who pioneered the field of fractal geometry; one of the two-dimensional fractals he described was the Sierpinski triangle. His triangle was one of the first shapes understood to demonstrate self-similarity: the property that its shape at any level is the same as its shape at its largest level. The Sierpinski tetrahedron is a three-dimensional shape realizing the same concept – a tetrahedron is a pyramid with a triangular base.

Bat Country represents the idea of self similarity; the full-scale installation is an assembly of 64 small tetrahedrons. To understand the Sierpinski tetrahedron, consider one tetrahedron, made with six bats, one for each edge, and four balls, one at each corner. With four such tetrahedrons you can assemble a first-generation Sierpinski tetrahedron (requiring 6x4 = 24 bats). If you combine four first-generation tetrahedrons, you get a second-generation tetrahedron (requiring 24x4 = 96 bats). If you combine four of these in turn, you get a third-generation tetrahedron (requiring 96x4 = 384 bats).  This is Bat Country, a third-generation Sierpinski tetrahedron.
It has 1 jumbo tetrahedron, the whole sculpture.  It has 4 large tetrahedrons, with 4 bats on each edge.  It has 4^2 = 16 medium tetrahedrons with 2 bats on each edge.  It has 4^3 = 64 small tetrahedrons made from 6 bats.

In all, there are 1 + 4 + 16 + 64 =  85 tetrahedrons across the 4 sizes.

The negative space between each tetrahedron forms a regular octahedron with eight triangular faces. The largest octahedron, in the center of the sculpture, is about 10’ high. This space, large enough for several people to stand in, serves as an inhabitable ‘room’ inside Bat Country. Self-similarly, four smaller octahedrons, one at the center of each second-generation tetrahedron, are each about 5’ high; there are also sixteen small octahedrons, one inside each of the first-generation tetrahedrons.
So far, we have assembled the full structure three times: The first time was a test build in South San Francisco, and the other two times were at Burning Man 2008 and 2009.

We build it from the bottom up.  It takes a lot of wrenches and hands to work them because this sculpture goes together with a whole lot of bolts.  There is a bolt on both ends of each bat, and 8 more that join 2 steel connectors together where the balls are.  2 x 384 + 8 x 127 = 1784 bolts. 

First we build the bottom layer with 3^4 = 81 bats.  
Then we add another 81 bats to make 27 little tetrahedrons.
Eventually, we get nine first generation Seirpinski tetrahedrons...
... and three second generation Siepinski tetrahedrons.  Then, we erect a scaffold and build the top quadrant on top of the other three.
This is the hard part.
The last bit goes up quickly.
This is some of our campmates and crew. 
This is Bat Country on the night of the Burn in 2009.
In 2010, we brought a quarter of Bat Country to the Playa to pitch at our camp.  I made some shade panels for it like this, and I plan on making a few more this year.  The panels not only provide shade, but make it more visible from a distance.

This is Paul Brown.  He is Bat Country's engineer.
Paul is also my partner.  Here we are together, Paul and me.
 This is me building Bat Country.
Bat Country was originally modeled after my 3 inch tall, beaded Sierpinski tetrahedrons like these.


Thanks for looking!

Friday, March 15, 2013

New Pattern: Lotus Drop Earrings

Here is my latest pattern, the Lotus Drop Earrings.  Here is the first pair, made with cubic right angle weave (CRAW).  I fell in love with the design, but I wasn't looking forward to writing another pattern with CRAW.    You can see the back is different from the front.
I also made this pair to illustrate how you can add wire wrapped drop beads that dangle from the bottom point.
See how small they are, a great size for earrings, I think. 
When I showed them to Florence, she liked them too, but I when I told her that I really didn't want to write another pattern with CRAW, she had the brilliant suggestion to redesign them to remove the CRAW.  Then she proceed to make me a prototype that gave nearly the same result, but with a different stitching pattern.  I tweaked them a bit more and made this pair.  Between the two of us, we came up with a design that's thinner than the others, and a bit lighter too.  It doesn't have any extra beads that don't need to be there, and it still has just enough thickness to give them some structure so they don't bend. They're rigid, little components.
Then I made this pair with real gemstones and gold plaited charlotte seed beads. With the improved design, they're not only easier to make, but the crystals in the windows don't have beads behind them.  So they really sparkle.
 
Aren't they pretty?  My mom really fell in love with this pair.  So if they don't sell before her birthday, I know what she's getting this year.

Here's the one kit I have made so far.  The pattern explains how to make both the large and small lotus drop components in these earrings.  
Here you can see how big they are, just the right size for long earrings, I think.  In fact, they're my new favorite earrings. They're not too heavy, and the links make them drape beautifully.  I feel like a movie star when I wear them! 
These little components are really fun to link together and hang things from.   If you want the earrings, click the photos.  If you want to learn how to make your own, my pattern is very detailed with 16 pages and 81 color illustrations and photographs, including 5 full pages of variations and inspirations.  Also, look out for my next blog post, and I'll show you some more complicated things you can do with Lotus Drops.  Thanks for looking.

Tuesday, March 12, 2013

New Kits for Infinity Dodecahedron

We put together a new kit for the Infinity Dodecahedron that makes all six beaded beads shown here. The little black one is the beginner lesson, and the other five make a set for jewelry. Since the holes are so large, you can easily string them on cord or a narrow chain.  Thanks for looking!

Sunday, March 10, 2013

Pillow Beaded Bead with Picnic Weave

This pendant is a tiny patch of seed beads that I wove into a symmetric pattern that reminds me of a picnic blanket, and as such, I call it Picnic Weave. The weave is carefully constructed to make two layers like the surface of a pillow. The pattern continues uninterrupted around the edges and corners, and it looks the same on the front and back.
This Picnic Weave fits nice and tight, and although the beadwork is flexible it's not saggy. You can push in the corners, as in the second photo to puff up the pillow and then easily flatten it again. It's quite a fun piece to fiddle with. The colors are speckled pink and green with high quality matte gold.

 
This is a little pendant and is very light but has a lot of detail for its size. It has a lot of holes and you can string it in several different ways with a thin cord or chain or beading wire.
Picnic Weave is a simplified version of Night Sky Weave.   I discuss Picnic Weave in my Night Sky tutorial with detailed photos in the section on variations and inspirations.  However, this kind of "pillow beading," this is newer than my Night Sky tutorial.  So I don't mention pillows in the tutorial. 
Thanks for stopping by.

Tuesday, March 5, 2013

Sneak peek: Lotus Beaded Pendant

Here's a sneak peek at one of the variations for the newest pattern I'm working on.   I call it a lotus beaded pendant.
Although you could have strung it through the points on the petals, I added a peyote stitched bail for easy stringing.  Plus, now you can use a thick cord.
This piece is for sale.  Click the photos to go to the listing.  Thanks for looking.


Related Posts Plugin for WordPress, Blogger...