Monday, December 29, 2014

New Tutorial -- Snail Shells & Twisty Bits, Beaded with Peyote Stitch and Cellini Spiral

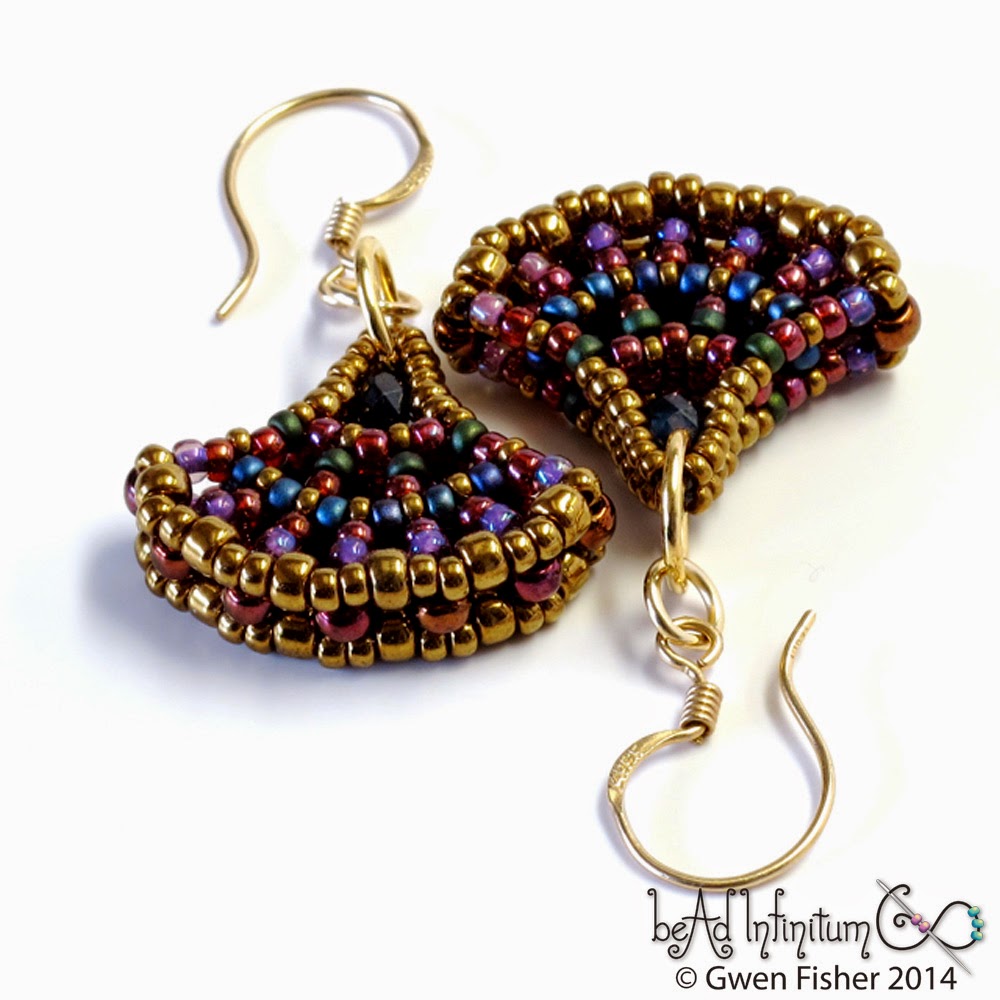
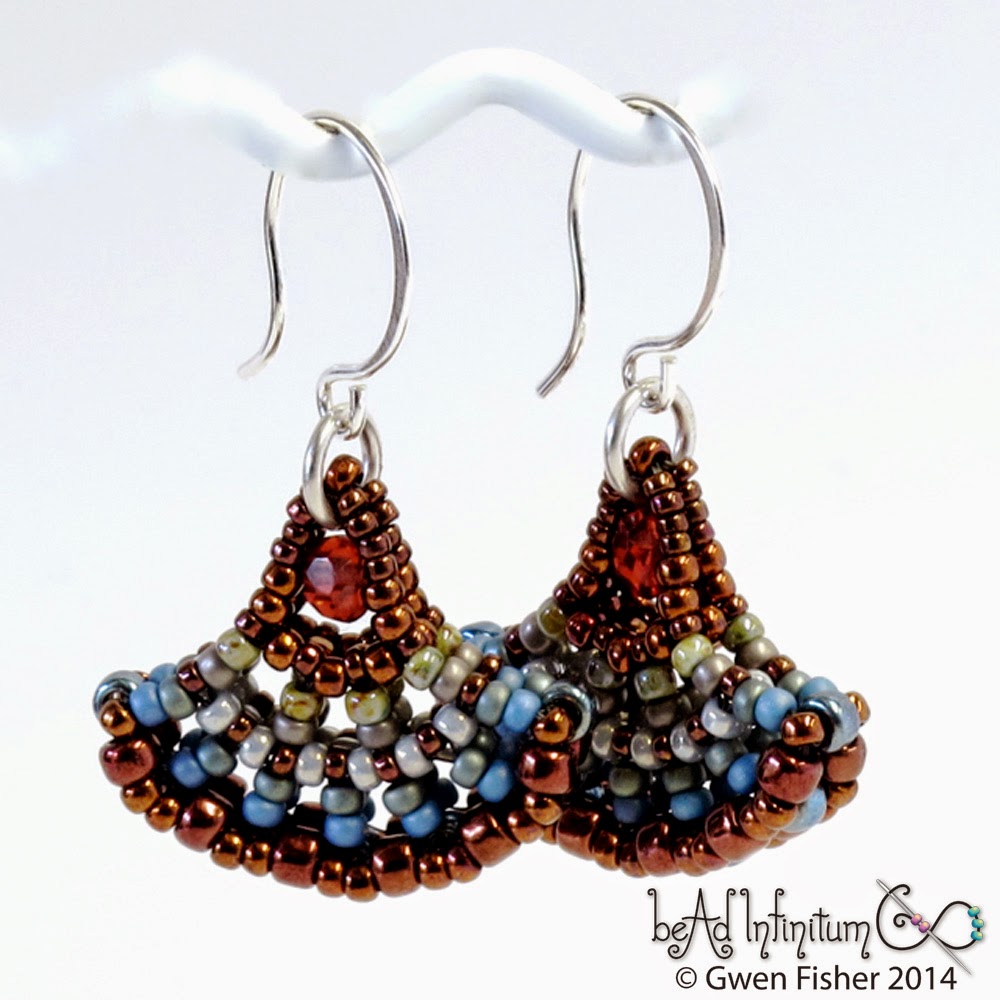
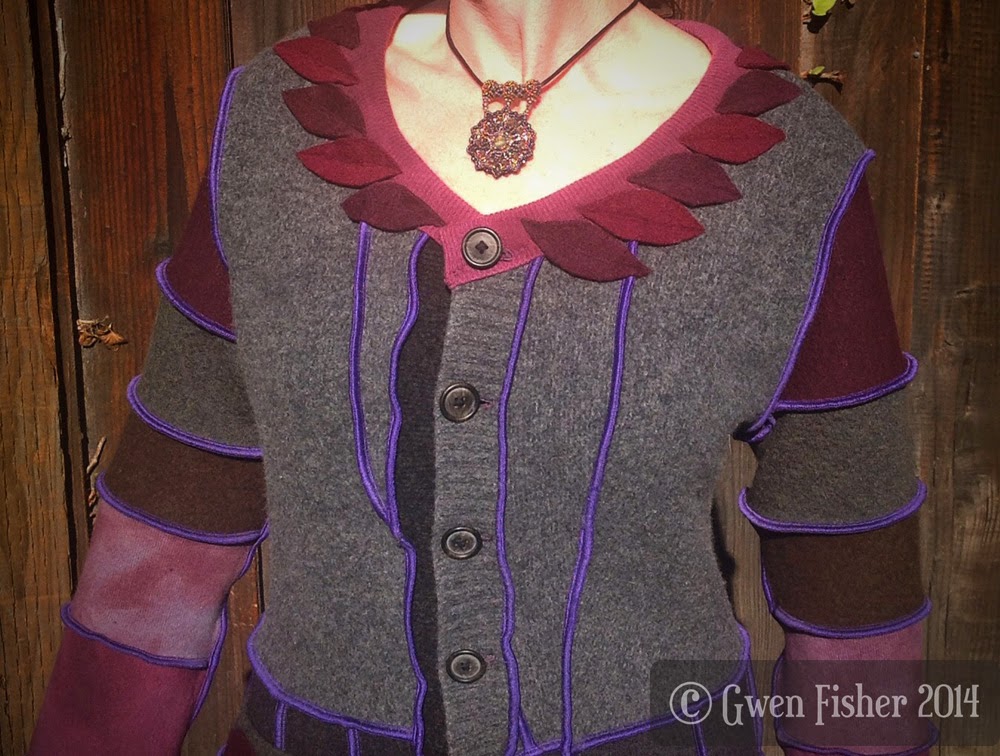
For the last couple months, I've been working on some new variations of Cellini Spiral. 
http://gwenbeads.blogspot.com/2014/12/replicating-dna-in-beads.html
With nothing more than seed beads and thread, you can learn to make bracelets, pendants, and beaded beads using my new tutorial, Snail Shells and Twisty Bits.
http://gwenbeads.blogspot.com/2014/12/replicating-dna-in-beads.html
Like the popular Slugs in Love beaded pendants, Snail Shells and Twisty Bits are my original variations on the common Cellini spiral, combining peyote stitch, increases, and decrease.
http://gwenbeads.blogspot.com/2014/12/replicating-dna-in-beads.html
This tutorial teaches you several different techniques that you can use to make all the designs shown here, or you can combine them in new ways to design your own beaded jewelry.
http://gwenbeads.blogspot.com/2014/12/replicating-dna-in-beads.html
This tutorial is designed for beaders who already know how to bead weave Cellini Spiral and join two ends. If you would like to learn these techniques, I recommend this free video by Jill Wiseman:
The pattern for Snail Shells and Twisty Bits is suitable for intermediate bead weavers, with enough design possibilities to entertain advanced bead weavers. You can make lots of different designs, all with just seed beads and thread. No fancy shapes required.
The tutorial is a whopping 26 pages, with over 120 full color illustrations and photographs, making it one of my longest beading tutorials I've ever written.  I was very tempted to break it into two separate tutorials, limiting each to one main project with a variation or two, but I made 8 different designs all using the same techniques, and I can imagine at least as many more. By keeping it whole, I found that I could teach a bunch of different techniques that work together. That way, you beaders can combine the techniques to make your own designs for pendants, bracelets, and beaded beads. The tutorial gives highly detailed instructions for every step in the necklaces and bracelet, and then I show you large photos and give charts and commentary to help you build increasingly larger spirals and more complex pieces using the same techniques. It's both a project tutorial and a technique tutorial.  So, ask yourself, do you love Cellini spiral?  If so, then you will really enjoy Snail Shells and Twisty Bits.

Thanks for looking!

Friday, December 26, 2014

Replicating DNA in Beads

I got a request to make piece of beaded DNA that is forked to look like it's replicating.
The specific sequence it shows is this:
GACN6GTC 
CTGN6CAG

Because this sequence is a palindrome,  when you fork it at the center, you get three identical branches.
This DNA sequence is recognized by an enzyme produced by this particular bacteria, Deinococcus radiodurans. It's a very tough bacterium. When I read, "As a consequence of its hardiness, it has been nicknamed Conan the Bacterium," I knew it was the one! 
If you would like to learn to make your own beaded DNA, check out my free video tutorial

Friday, December 19, 2014

Tuesday, December 16, 2014

Patchwork Sweaters and Skirts

I've been sewing sweaters and skirts lately.  They say make what you like.  So I made this cardigan hoodie in blues and grays, all upcycled from felted wool sweaters, mostly merino.  This sweater is SOLD.
https://www.etsy.com/listing/213314668/
Here's a purple pullover sweater I made for my sister because purple is her favorite color.  She asked for a V neck, so I made her a V neck.  I've never made a V neck before, but she's happy. So that's all that matters.  It's made from mostly cashmere with some wool.  I hand dyed the two brightest purple fabrics because there just aren't enough purple cashmere sweaters made for my needs.  Both of these sweaters were inspired by the work of Katwise.
I decided that I really REALLY like the scrappy patchwork look in clothing.  When I wear patchwork clothing made from lots of different fabrics, I feel happy, like a well-loved rag doll.  Here is a blue skirt that looks cute with the blue sweater above.  It has a bunch of different fabrics from my quilting cotton collection and a double ruffle trim. 
https://www.etsy.com/listing/215441586/
I made the waistband have a secret tie on the inside.  It's mostly elastic, but with the tie, you can get the waistline just the right length for a perfectly comfortable fit. 
https://www.etsy.com/listing/215441586/
Here is a green skirt, all in cotton with an elastic waist.  These skirts are for sale at Isabella Boutique in downtown Sunnyvale, CA.   The design of both of these skirts was inspired by the work of Obsequies.
This is a close up of the green and gray ruffled hem.  It looks like yellow, but it's really chartreuse. Limy lime green, my favorite color.
https://www.etsy.com/listing/215446387/
I'm about to release a new tutorial soon.  I haven't released a new tutorial in a while because I've been working on one tutorial for about two months. I took the first step photo in October. It's a sequel to Slugs in Love, including a bunch of Cellini spiral variations and techniques. I have taken a few breaks from this project, like when I was beading some older designs (in Marsala), and doing the sewing shown above. 
Now this tutorial is almost done.  There is light at the end of the tunnel! It looks like it's going to be 26 pages with around 130 photos and illustrations, definitely making it one of the longest beading tutorials I've ever written. I was very tempted to break it into two separate tutorials, limiting each to one main project with a variation or two.  But I made 8 different designs all using the same techniques, and I can imagine at least as many more.  So I'm keeping it whole.  By keeping it whole, I found that I could teach a bunch of different techniques that work together. That way, you beaders can combine the techniques to make your own designs for pendants, bracelets and beaded beads. I'm calling it "Snail Shells and Twisty Bits." I really hope you gals will find it worth the wait.  Thanks for looking.

Friday, December 12, 2014

Marsala Necklace with Pantone's 2015 Color of the Year with Aquamarine and Titanium Gray

I think I'm actually starting to fall warm up to Marsala, now that I finished a beaded bead necklace made with Pantone's suggested pallet for marsala, including titanium gray and aquamarine.
I made this necklace match the Ginkgo Earrings I beaded last week by using a lot of the same seed beads.
I really like marsala with gray and pale blue, but it doesn't seem to generally play well with lots of colors, in my opinion.  Since it has a lot of brown in it, if you add too many other dull colors, the whole thing can get murky.
In making this necklace, I was very careful to stick to Pantone's suggested pallet. Every time I deviated, I liked the combo a lot less. In the evolution of this necklace, I had some mossy green in there, like a dull lime. It made the whole thing look really muddy and dated. So, I remade a mossy green beaded bead in blues and traded out some of the greenish lampwork for blues and cool grays, and the whole thing looked really different, more vibrant and classy.  You can see that there is still a bit of green in there, but a lot less than there had been at one point.  This showed me how it's not just the colors you use that create a pallet, but in what proportions you use them.  A little dull green is okay.  Too much, and it looks muddy.
It's amazing to me how subtle changes in colors in a color combo can make a big difference in the overall impact.  In the end, I'm very pleased with how the colors work together here.  The warm marsala plays well with the cool blues and grays.  The necklace and matching earrings are for sale in my Etsy shop.  Thanks for looking.

Saturday, December 6, 2014

Pantone's 2015 Color of the Year Marsala on Ginkgo Leaf Earrings

I challenged myself to use Pantone's 2015 color of the year Marsala, something of a muted brownish scarlet that reminds me of spilled red wine on an off white table cloth or worse, dried blood. 
Marsala Ginkgo Earrings
I think a brighter or darker shade of red, like pomegranate or scarlet would have been a great improvement over Marsala. I wonder if designers will tend towards brightening this up a bit. If they really wanted a wine, I think Chardonnay would have been a better choice with its warm sunny yellows, but hey, they didn't ask me.  Anyway, here's my first pair of Marsala Earrings with golden bronze.  Here I went with more of a cranberry for my Marsala and then browned it up a bit by adding Bronze.  Other colors include rich dark blue, purple and forest.
Marsala Ginkgo Earrings
This pair I made second, and used cool gray and pale blue.  Here, the brown seed beads are a bit browner than Marsala, but the sapphires are pretty spot on.
Marsala Ginkgo Earrings
 Both pairs have sparkling faceted sapphires to add just a touch of twinkle.
Marsala Ginkgo Earrings
I predict that Marsala is going to be a tough color for designers in 2015. What do you think? Do you like Marsala?  I think it's going to take me a few months to warm up to it.  I guess I like it with the blue and gray.  It feels sort of modern-ish.   

The tutorial is available in my Etsy shop if you want your ears to be a la mode, superchic!  Click on the photos to go to the listing.  Thanks for looking.

Saturday, November 29, 2014

Related Bead Stitches - Peyote Chenille Netting Herringbone Pondo SRAW

Here is a comparison of a few related bead weaving stitches, including peyote, chenille, netting, filled netting and herringbone. I needed to see them all together to get exactly how they are different and how they are similar, too.  So I drew this picture.
Netting and chenille stitches look very similar when they are beaded.  Chenille is a tighter weave than netting.  Chenille doesn't stretch the way netting can.  

After making the above drawing, I realized I left a couple of related stitches out, including SRAW and Pondo stitch
All four of these here are woven differently but look nearly identical when beaded. All four have the same beads in the same relative placements, but the ways the beads are connected with the thread is different. Another difference is that in Netting and Chenille, all of the blue bead holes are parallel to each other. In SRAW and Pondo, some of blue bead holes are horizontal and some are vertical. They alternate row by row. Netting is the fastest and stretchiest of the four. My personal favorite is SRAW because it's strong, and I can weave it in any direction. It's also pretty fast because you pick up 5 beads at a time on most stitches.

Happy Holidays!  Thanks for looking!

Tuesday, November 25, 2014

More on Puff Beads, a design for the beaded bead connoiser who loves right angle weave

I finished a new tutorial last week, called Puff Beads.  The Puff Bead technique is shaped Super Right Angle Weave (SRAW) with some embellishment to make it stiff.  I'm pretty sure that puffs are not the most visually beautiful jewelry I've ever created, but structurally, mathematically, they are quite nice... fascinating, really.  If you are a connoiseur of beaded beads, and enjoy making them as an intellectual activity, I think you will really enjoy making this design.  I think what makes Puff Beads interesting is that you bead the surface of a shape made out of cubes, in particular, a torus. I mean, who doesn't like doughnuts, right? 
But seriously, most beaded tori include the whole doughnut, including the volume on the inside AND the surface on the outside: the cake AND the frosting.  Puffs are just the frosting.  Certainly there are peyote stitched tori where you only bead the surface, like my Nuts and Washers below, but with peyote stitch, the beads sit so close together, you can't see through the beadwork.   
https://www.etsy.com/listing/193802036/

In comparison, when you bead just the surface of a doughnut with SRAW, you get a square lattice of beadwork with holes that let you see inside the doughnut, like right through the side. 

In particular, you can see the big hole through the little holes from all different directions, and I think that makes this technique rather unusual. Thinking further, one could apply this technique to cover all kinds of crazy surfaces made out of cubes, like these pink cuboids, for example.  I just learned that a shape assembled out of cubes placed face to face is called a "cuboid."
My tutorial is designed to teach you the theory behind bead weaving cuboids with SRAW, and I chose the torus as my explicit step-by-step project because I like the idea of beading a hole through the center of a sphere.  At the end of the tutorial, I also show examples of beaded beads using the structure in figure C above, with some discussion about how to apply the techniques to this cuboid design, but I don't give explicit step-by-step instructions for how to do it.  My goal is that after you learn how to build a torus, then simpler shapes will be easy for you figure out how to bead without me telling you every step.  That's my hope, anyway.

... because there is so much cool stuff you can build with cubes.  For example, you could use the Puff technique to bead weave the surface of a trefoil knot, like this beautiful wooden puzzle by Tom Longtin.

I'm not saying it would be easy, just possible.  (I just thought I'd throw that challenge out there to see if I get any takers.)  Of course, you could also build this knot with cubic right angle weave, like I did for my Highly Unlikely Triangle. That would also be nifty.  

So if you really love cubes, and you want to learn the Puff Bead technique, you can find the tutorial here:  https://www.etsy.com/listing/210844618/
https://www.etsy.com/listing/210894145/
And for those of you who just want to look at pretty pictures, or want some beads but don't want to make them yourself, I put this pink necklace up for sale, you know, just in case you like pink.  Thanks for looking.
https://www.etsy.com/listing/210894145/

Sunday, November 16, 2014

Wisdom Mandala in Pink Purple Amethyst on Silk Cord

Do you get in color moods? I sure do. I feel like I've been in a pink mood for a while now. As long as I'm playing with pink, I'm happy.
  https://www.etsy.com/listing/211195710/
I really enjoy weaving Wisdom Mandala Pendants because each one is an exploration of color. When I got all of these new pink beads over the summer, I knew I'd have to eventually make a pink one, complete with matching 100% silk cord that I spun on my spinning wheel.
  https://www.etsy.com/listing/211195710/
This piece is for sale in my Etsy shop.  Click on the photos to see the listing.
The pattern available here: http://www.beadinfinitum.com/Kits/Wisdom_Mandala.html

Thanks for looking.

Thursday, November 13, 2014

TUTORIAL Puff Beads -- a beaded bead torus with Embellished Super Right Angle Weave

Puff! Puff! Puff!

https://www.etsy.com/listing/210844618/
Learn to make your own Puff Beads like the surface of a doughnut with a tube of seed beads forming the hole.  You can easily string them on a chain or cord like I did for the pink necklace on the cover of the pattern.
https://www.etsy.com/listing/210844618/
Mostly stiff, but a still flexible, Puffs are beaded beads made with embellished super right angle weave (E-SRAW). Do you enjoy right angle weave (RAW) and want to learn more? Before attempting this tutorial, you can learn flat SRAW on my blog for free at http://gwenbeads.blogspot.com/2011/02/animated-video-tutorial-on-how-to-weave.html.
https://www.etsy.com/listing/210894145/
Puff Beads are made with just three sizes of regular Japanese seed beads and beading thread, making them a great way to use up seed beads leftover from other projects, and they look great simply strung on cord with a few lampwork glass beads.  Materials lists are included for various sizes of seed beads and embellishments including optional rose montees like I used on the green beaded bead below.
This tutorial shows how to shape SRAW into the surface of a torus, and embellish the outside. Included are 2 pages on the theory of shaped SRAW, 12 pages showing step-by-step instructions for the main design (the torus), and 5 pages showing 4 geometric variations of beaded beads that are simpler and smaller than the main design. The tutorial guides you to apply the theory and techniques to make the other designs in several sizes from 11 mm to the 23 mm Puff Bead.
https://www.etsy.com/listing/210844618/
The tutorial is a PDF file with 20 pages, including over 120 illustrations and photographs with lots of writing explaining the pictures. Suitable for intermediate bead weavers with enough variations to inspire advanced weavers.
https://www.etsy.com/listing/210844618/

Thanks for looking.

Tuesday, November 4, 2014

Upcycled Sweater Number 5

I really enjoy making these new sweaters out of old sweaters, enough that I decided to start numbering them.  This one is number 5.  I'm finally feeling more comfortable with the technique of sewing sweaters on my serger without fretting over every seam.
https://www.etsy.com/listing/209757932/sweater-dress-cardigan-upcycled-cashmere
It's made of fine wool and cashmere.  It's pretty soft, cozy and warm.
https://www.etsy.com/listing/209757932/sweater-dress-cardigan-upcycled-cashmere
Plus, it buttons up the front with some old buttons from my grandmother's button box.  I made the button placket myself, which I'm pretty proud of.  It took me 13 tries on a scrap to figure out how to get my sewing machine to make button holes properly, but I got it, and I took notes for next time. 
https://www.etsy.com/listing/209757932/sweater-dress-cardigan-upcycled-cashmere
I'm rather pleased with how the neckline came out.
https://www.etsy.com/listing/209757932/sweater-dress-cardigan-upcycled-cashmere
The little leaves are all stitched on separately.
https://www.etsy.com/listing/209757932/sweater-dress-cardigan-upcycled-cashmere
I also added leaves on the sleeve hems and on the patch pocket. This sweater is SOLD.  Thanks for looking.
https://www.etsy.com/listing/209757932/sweater-dress-cardigan-upcycled-cashmere

Related Posts Plugin for WordPress, Blogger...